Drive: documents and live data integrations
What this page is for
Drive is your organisation's home for documents and live data. Upload files for processing, or connect a live data source so tables flow into Drive automatically — via a daily sync (Xero, Supabase) or pushed from your own systems (Push API).
Uploading documents
- Drag files onto the drop zone, or click Choose manually to browse.
- Each document shows its processing status; tag documents with a type so they are easy to find and filter.
- Use the search box and Filters to narrow the list.
Organising documents into folders
Folders let you arrange Drive the way your team thinks about its documents. They are shared by everyone in your organisation, and they are purely for organisation: filing a document never changes how it is processed, what the assistant and analysis can see, or what is shared with lenders. Lenders see the documents you share with them as a plain list, never your folders.
- Create a folder with New folder next to the search box. It is created inside the folder you are viewing.
- Open a folder by clicking it in the table; the breadcrumb above the table takes you back up. The tree-icon button to the left of the search box shows or hides a folder tree beside the table, for jumping straight to any folder.
- Move documents by dragging rows onto a folder (in the table, the breadcrumb or the tree, when shown), or select them and click Move to…. Drag a selected row to move the whole selection.
- Upload into a folder by opening it first — new uploads land in the folder you are viewing.
- Rename, move or delete a folder from its actions menu. Deleting a folder never deletes documents: its documents and sub-folders move up into the folder that contained it.
Searching or filtering looks across every folder, and shows which folder each match is in.
Elsewhere in Tangible, document pickers (for example when adding a document to a credit memo) group documents under their folders, and linked documents show their folder path.
Connecting a live data source
Click Add integration on the Connect a live data source card and pick a provider:
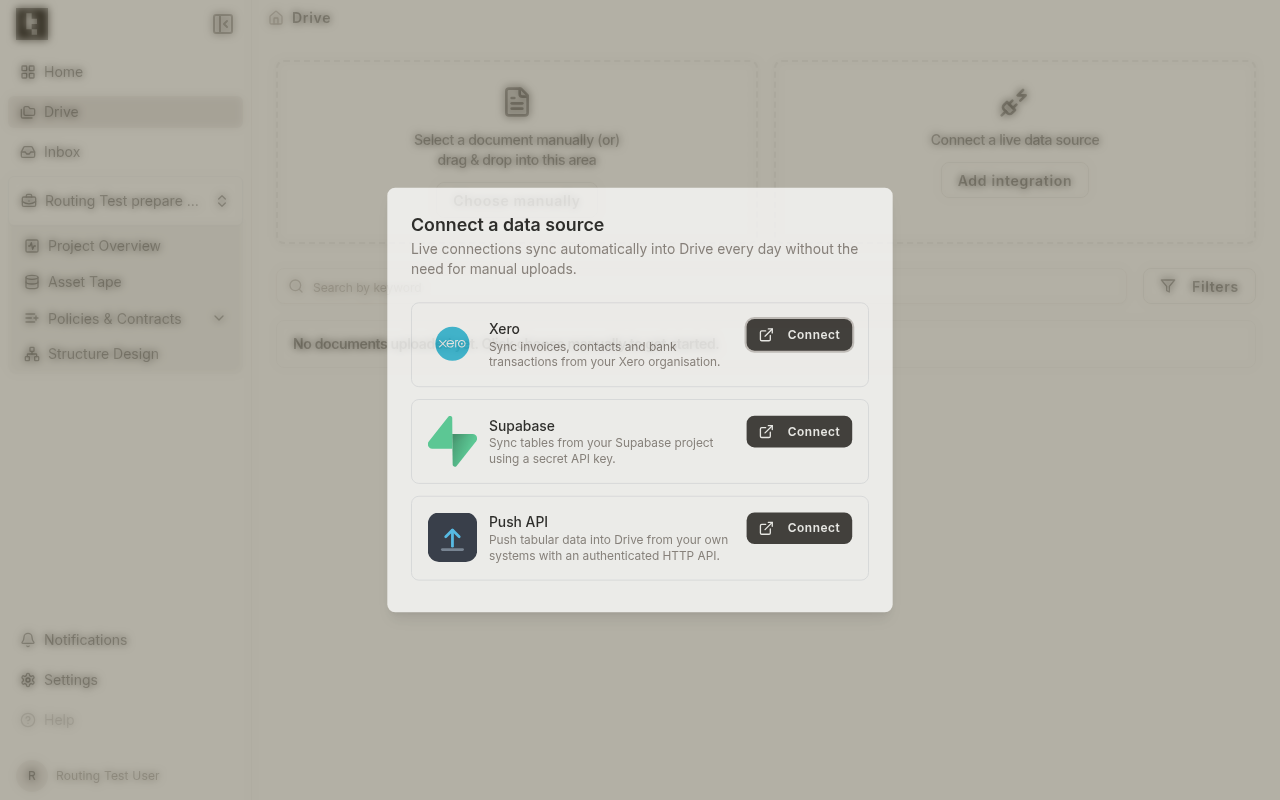
- Xero — OAuth consent; invoices, contacts and bank transactions sync daily.
- Supabase — paste your project URL and secret API key; chosen tables sync daily.
- Push API — your systems push rows to Tangible over HTTPS with a token you manage here. No outbound credentials, no schedule — data lands the moment you send it.
Connected integrations appear as rows at the top of the Drive table, each showing how many tables are receiving data. Open Manage connection from a row's actions menu to configure it, see its sync or POST history, and preview the stored data.
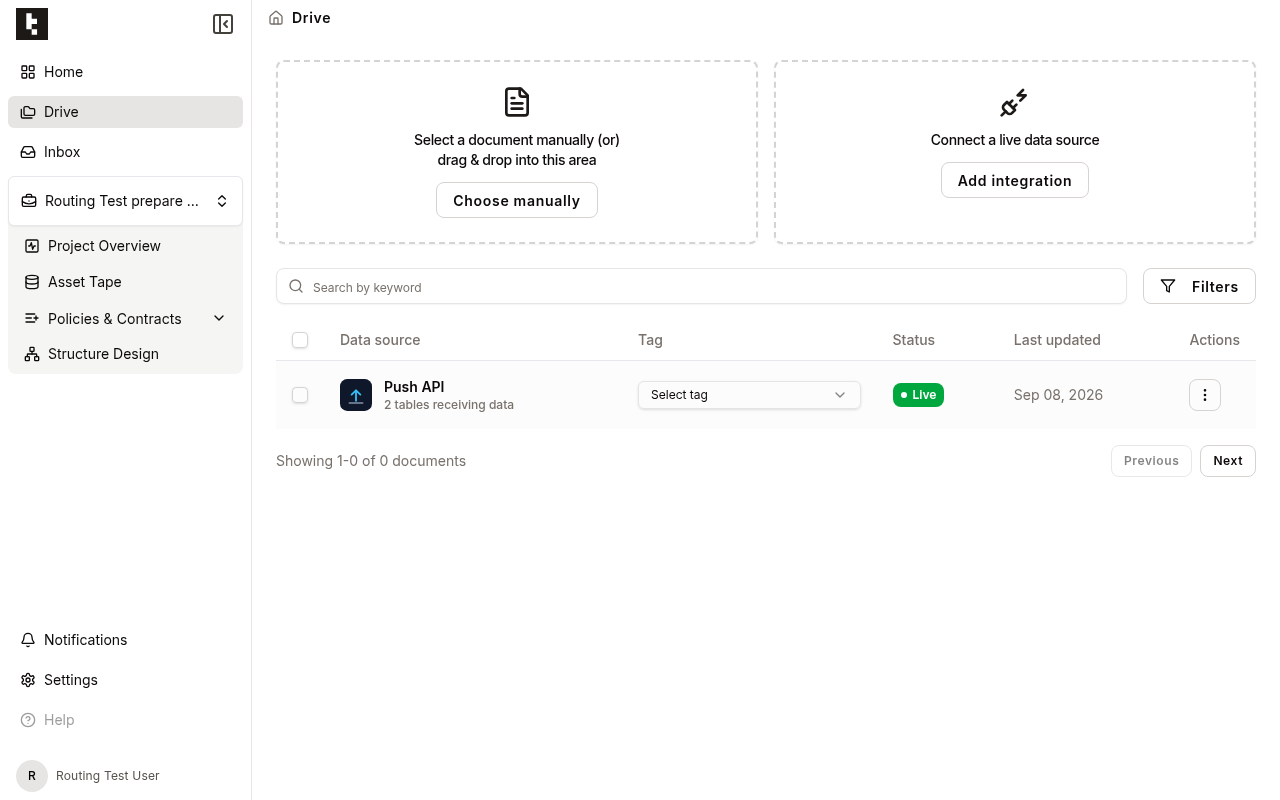
The Push API
The Push API turns Drive into a destination your own systems write to. Instead of Tangible pulling from a provider on a schedule, you POST rows whenever you have them — from a nightly job, a data warehouse export, or an event in your product — and each named schema becomes a live table in Drive that the rest of Tangible (analysis, asset tapes, the assistant) can use like any other connected data.
Enabling it and getting your token
Click Add integration and choose Push API → Connect. Before anything is created, the dialog shows the endpoint URL and ready-to-run examples in cURL, JavaScript and Python, so you can see exactly what an integration involves.
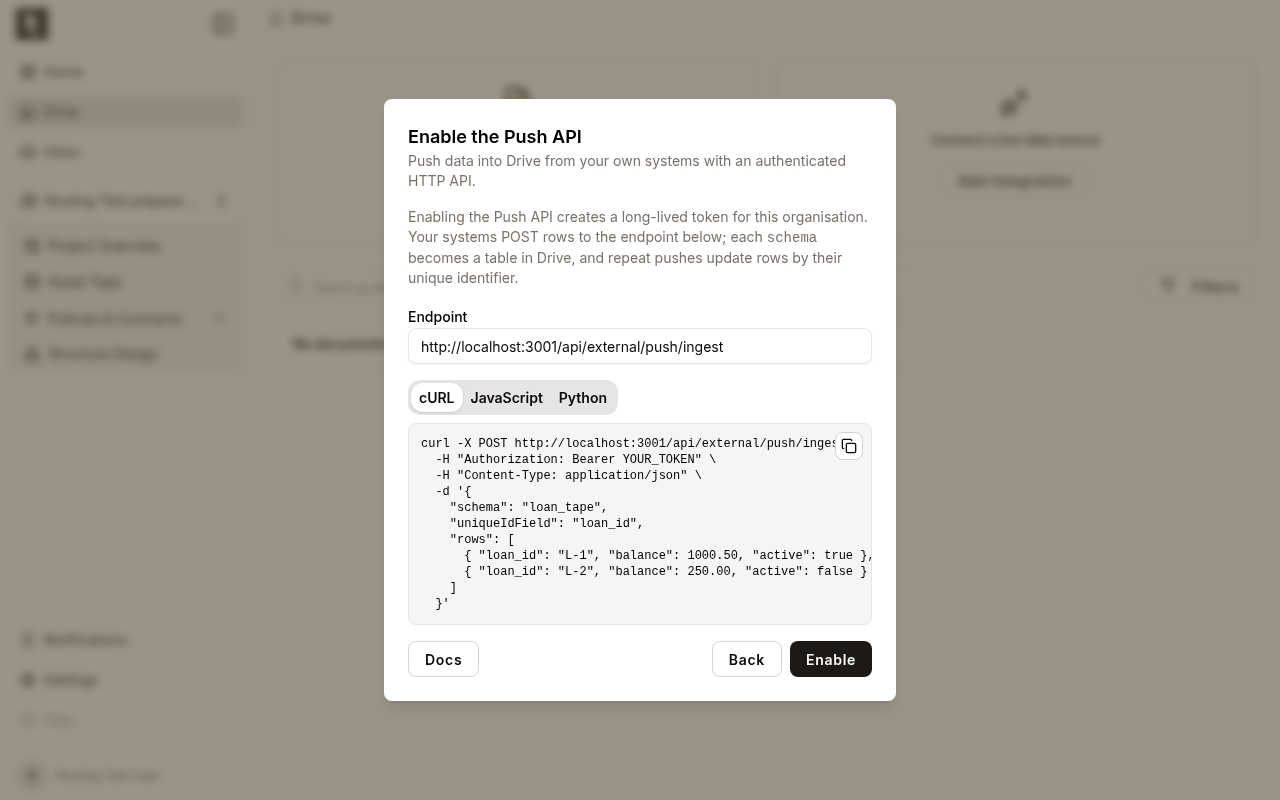
Click Enable. This mints your organisation's token and shows it once — copy it now and store it like a password. Only a hash is kept on our side, so it can never be shown again. The cURL example below it already includes the token, so your first push is one paste away, and the dialog listens live: a push made from your terminal appears in it while you watch.
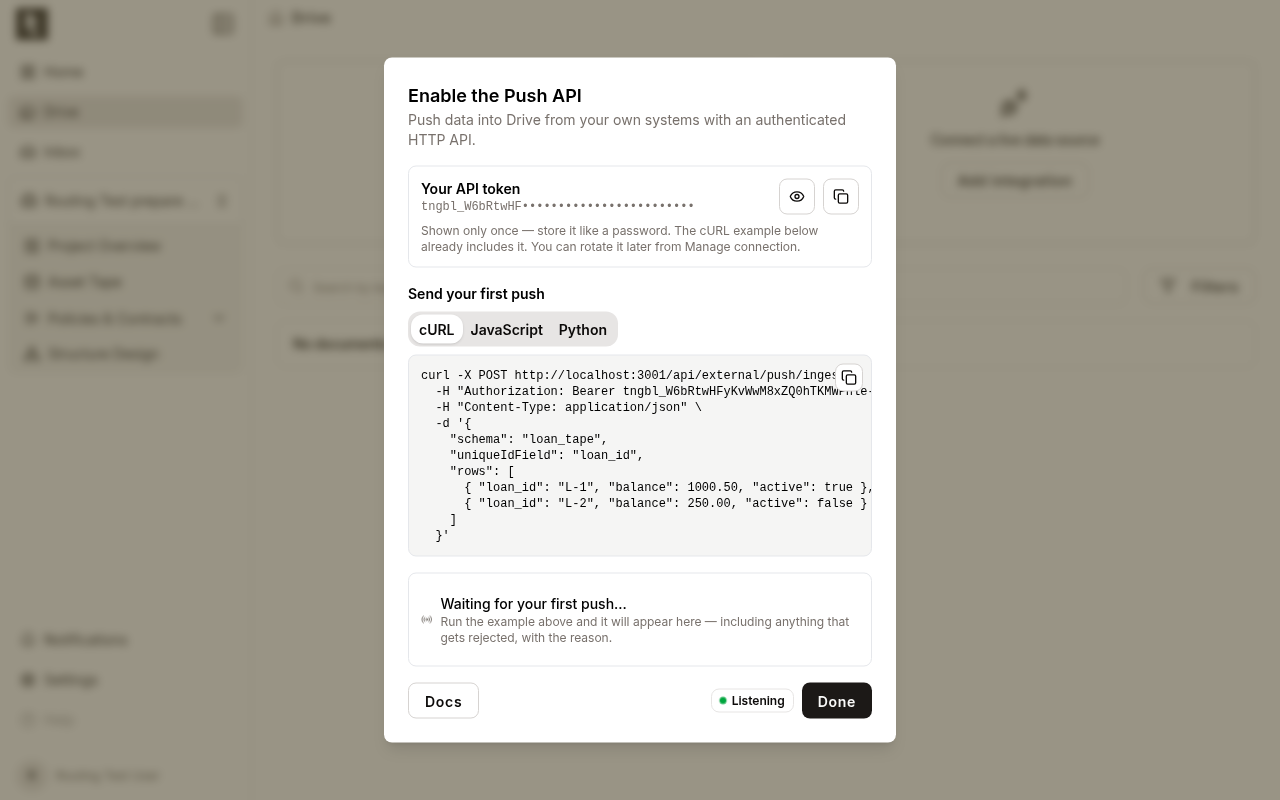
One token exists per organisation. If you lose it, or want to replace it, open Manage connection → Rotate token: a new token is minted and the old one stops working immediately. Rotating is the only way to get a new token — re-running Connect never replaces a token that is already in use, so it is safe to click. The manage view shows the token's prefix, when it was created and when it was last used.
The integration is listed on Drive from the moment you enable it, before any data arrives. Until your first push lands, the manage view keeps the endpoint and code examples on screen — on both the Overview and Data Preview tabs — so whoever picks up the integration later has everything they need without hunting for this guide.
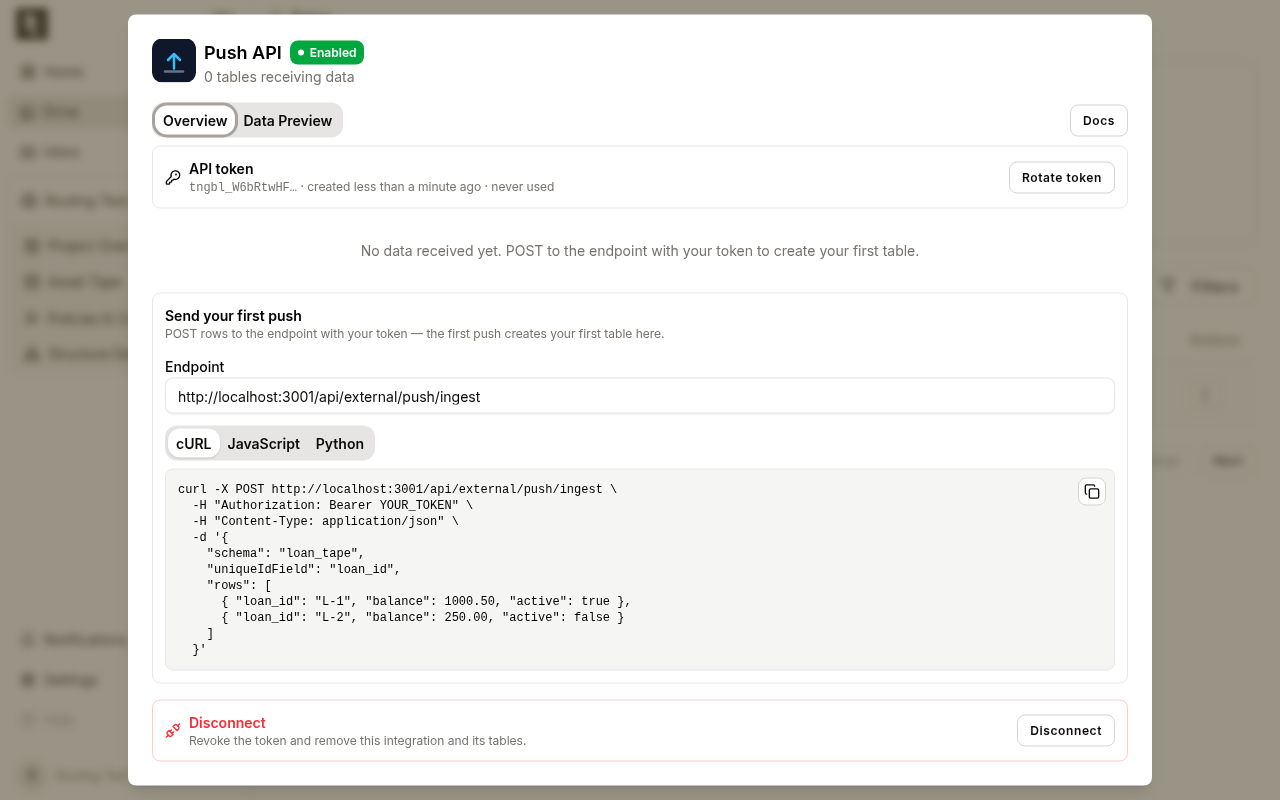
Pushing data
Send an HTTPS POST to /api/external/push/ingest with your token as a bearer
header:
curl -X POST https://<your-tangible-host>/api/external/push/ingest \
  -H "Authorization: Bearer tngbl_..." \
  -H "Content-Type: application/json" \
  -d '{
    "schema": "loan_tape",
    "uniqueIdField": "loan_id",
    "rows": [
      { "loan_id": "L-1", "balance": 1000.50, "active": true },
      { "loan_id": "L-2", "balance": 250.00, "active": false }
    ]
  }'
schemanames the table the rows belong to (letters, digits and underscores only). The first POST for a schema creates a new table in Drive; every later POST with the same schema name goes into that same table.uniqueIdFieldnames the column that uniquely identifies a row. It is required on the first POST for a schema and pinned from then on — later POSTs may omit it but cannot change it. Every row in every POST must carry a non-null value for it, and values must be unique within one request.rowsis an array of flat JSON objects. Values may be strings, numbers, booleans or null.
Rows are upserted on the unique identifier: a row whose identifier already
exists in the table is updated in place; new identifiers are appended. The
response reports rowsInserted and rowsUpdated per request.
Columns may evolve additively: a POST containing a new column adds it to the table (existing rows show null for it), and a POST omitting a known column leaves existing values untouched — new rows get null. Columns are never dropped or renamed by a push.
Limits
| Limit | Value |
|---|---|
| Rows per request | 5,000 |
| Request body size | 10 MB |
| Requests per minute per organisation | 60 |
Responses and errors
A successful POST returns 200 with the schema name, the number of rows
received, inserted and updated, and any columns that were newly added
(newColumns). If some values could not be converted to a column's existing
type they are stored as null and reported in castingIssues.
| Status | Meaning |
|---|---|
| 400 | Invalid body — e.g. a bad schema name, a missing/changed uniqueIdField, rows with missing, empty, null or duplicate identifiers, or a reserved column name (ingestId). |
| 401 | Missing, invalid or rotated token. |
| 404 | The Push API integration is not enabled for your organisation. |
| 413 | Too many rows or a body over 10 MB — split the payload into batches. |
| 422 | Your data reached storage but was rejected — e.g. a number too large for a whole-number column. The message explains which column and value; detail carries the storage engine's own wording. |
| 429 | Rate limit hit — retry after the Retry-After interval. |
A push is all-or-nothing: if any row is rejected, none of that push's rows are stored and the table keeps the data from your previous successful pushes.
When a push fails
Pushes that fail validation (the 400s above) are refused outright and leave no trace. A push that is accepted but then rejected by storage (422) is recorded so you can investigate: it appears in the POST history as a red Rejected entry, with a plain-English explanation of what went wrong — which column, which value, and which row, identified by its unique id. View error opens the full explanation, with the storage engine's original message available underneath as technical detail. Fix the values and push again.
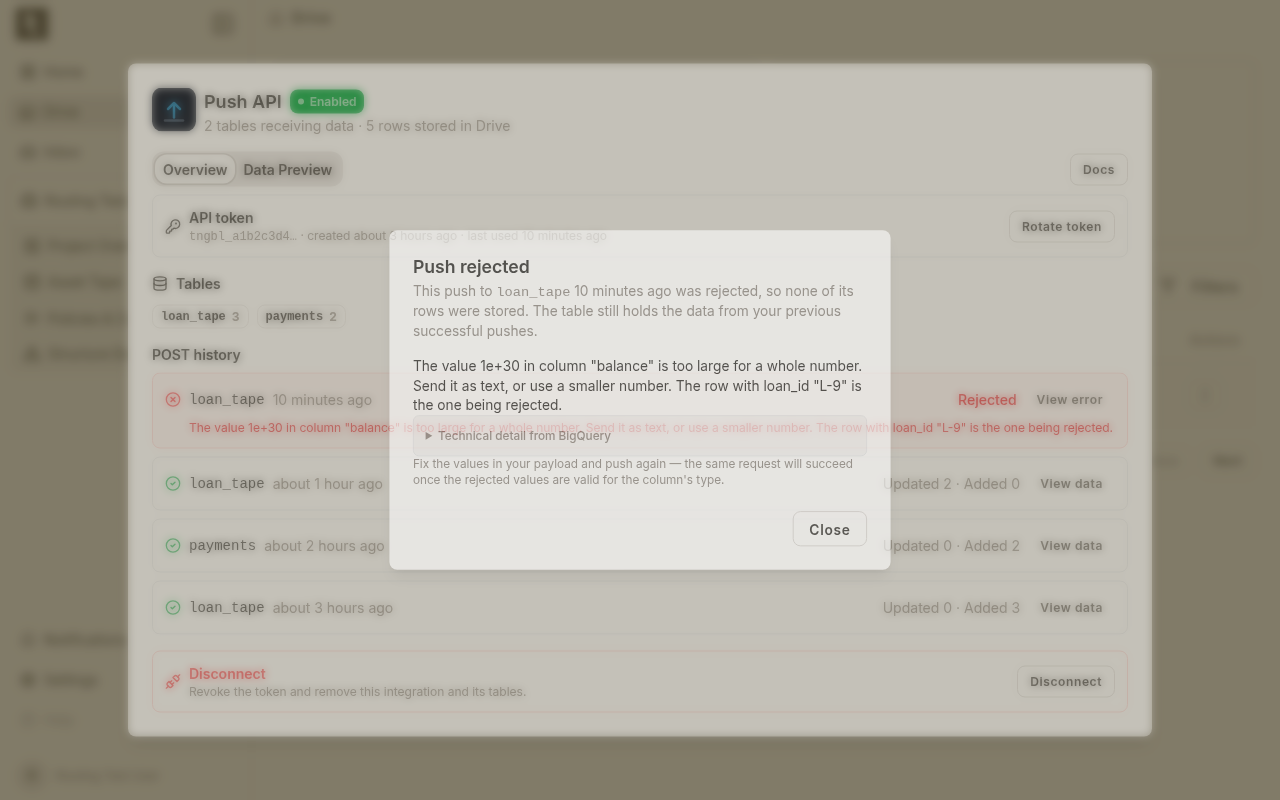
A rejection never corrupts the table: the push is all-or-nothing, so the table keeps exactly the data from your previous successful pushes until a corrected push lands.
Seeing what was pushed
Manage connection on the Push API row shows everything the integration has received:
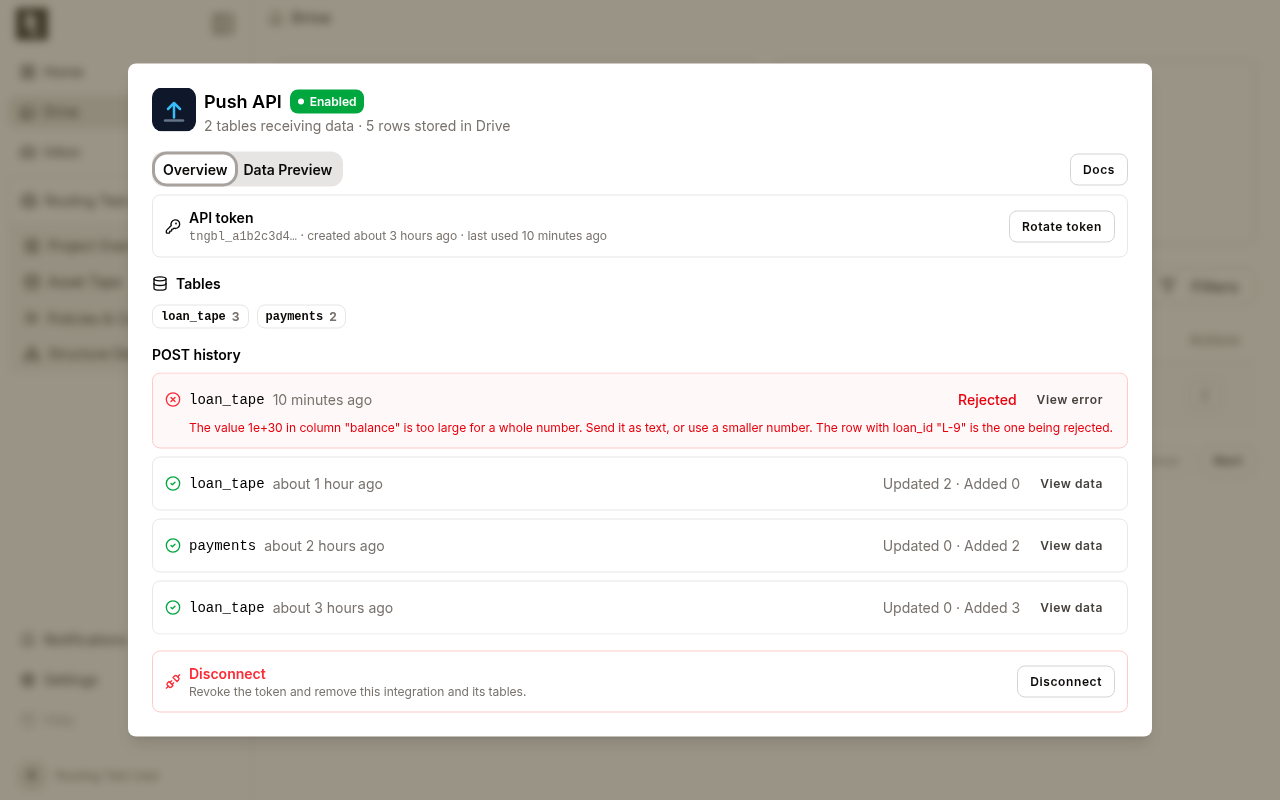
Overview — the token's status, the Tables receiving data with their row counts, and a POST history listing every request: its schema, when it arrived, and how many rows were updated or added. Successes and rejections are listed alike, so the history is a complete audit of what your systems sent.
Data Preview — browse the stored rows of any table without leaving Tangible, with the row total and the schema's unique identifier shown alongside. View data on a history entry narrows the preview to exactly the rows that one POST touched; Show all rows widens it back out.
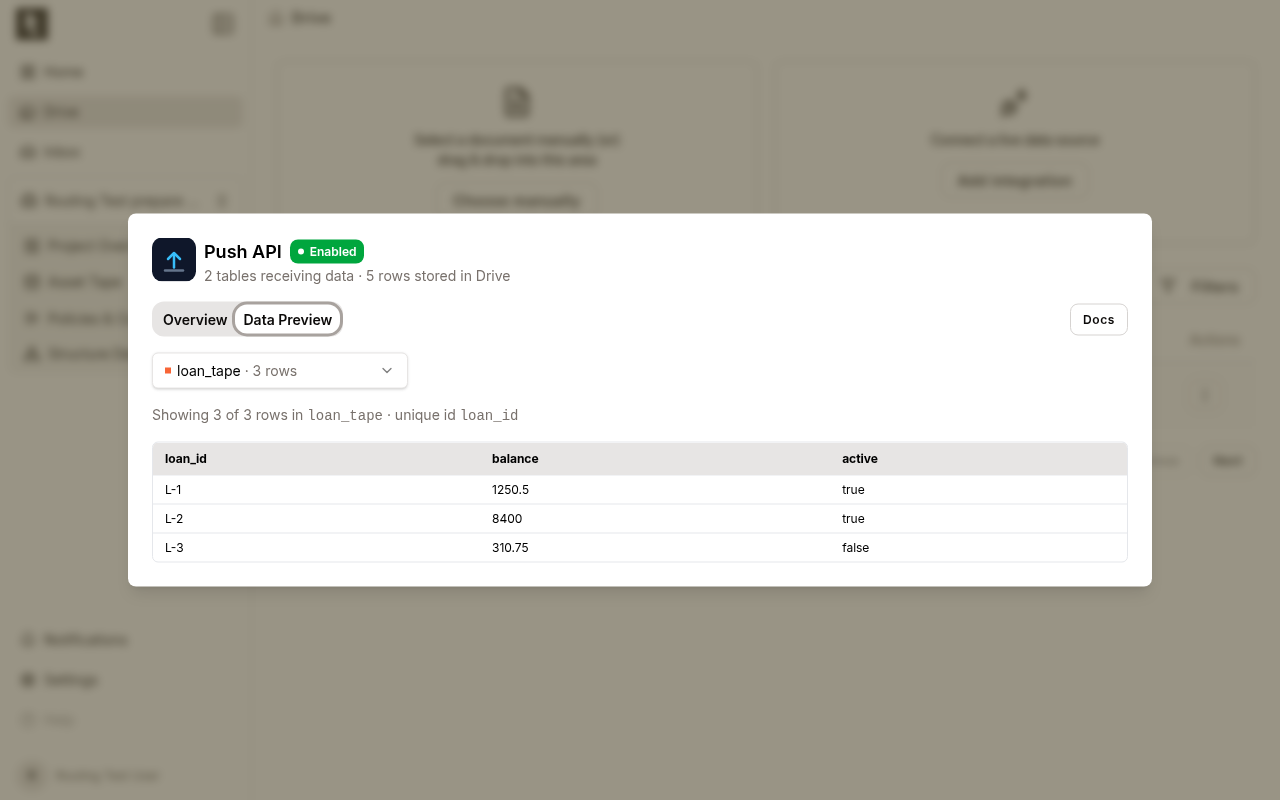
The preview and the history update live while the dialog is open, so a push made from a terminal shows up within seconds — no refresh needed.